Working on Branches in GitHub
Estimate Completion Time
 30 minutes
 -
Difficulty Level:
Step1 - Create three different branches with names – feature-test, bugfix-test, ui-test.
Step2 - Switch to the feature-test branch and create a new file and commit to the feature-test branch along with the commit message.
Solution
Step1 - Create three different branches with names – feature-test, bugfix-test, ui-test
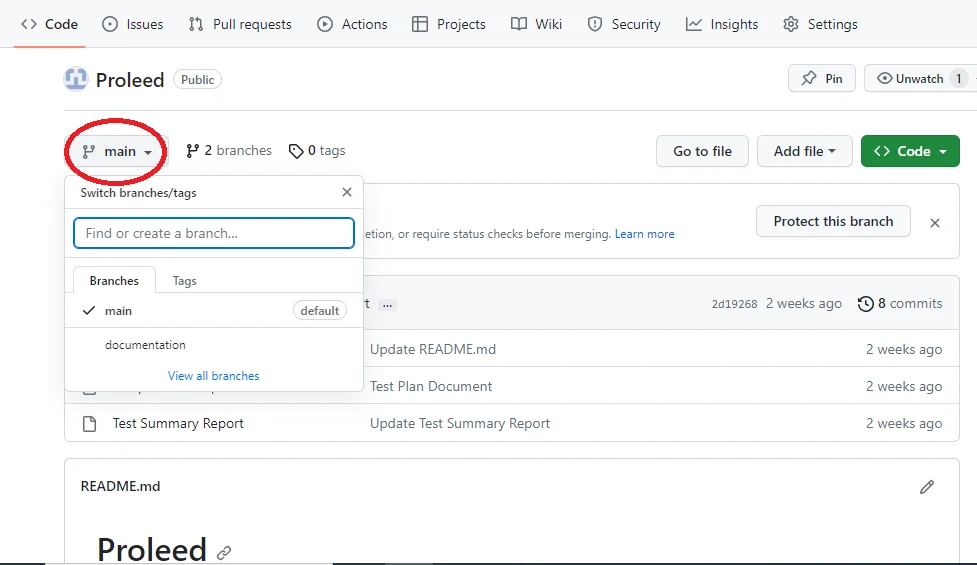
- Navigate to your GitHub repository.
- In the top-left corner, there is a drop-down labelled with “main” which is your default branch name. Click on this dropdown to display all branches.
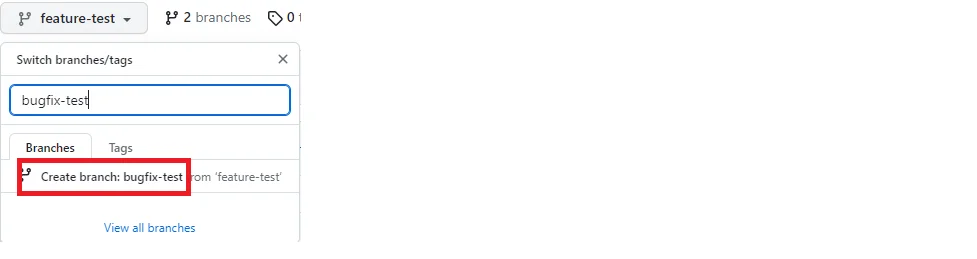
- To create a new branch, type the name of the first branch i.e. feature-test in the Search textbox and then click on the “Create branch: feature-test from main” option that appears below the search textbox.
- Similarly, repeat the steps to create other branches i.e. bugfix-test and ui-test.
- Now you have 3 branches in your repository that are displayed on the right side of the drop-down.
Step 2 - Switch to the feature-test branch and create a new file and commit to the feature-test branch along with the commit message.
- Click on the branch drop-down to select the “feature-test” branch from the list.
- Click on “Add file” then click on “Create new file”.

- Write the name of the file and enter the file content in the editor provided. When done, click on Commit Changes in the top-right corner.
- In the “Commit changes” section, add your commit message such as “Create a new document”.
- Make sure “Commit directly to the feature-test branch” is selected.

- Click on “Commit changes”.