A Comprehensive Guide to Effective Bug Reporting in Jira
Introduction
Have you ever clicked on an application, or a website, and had it not work the way you expected? Maybe a button didn’t work at all, or maybe the screen locked up. These instances were bugs – small mistakes in code that cause programs to do strange things.
To keep apps and websites working the way they should, teams need to find and fix bugs quickly. A common tracking tool companies use to track these bugs is Jira. Jira allows teams to record bugs, assign bugs to appropriate people, track progress to ensure bugs get fixed.
Regardless if you are a student, a new tester, or even an existing team member, Jira is going to be a very useful skill to have. If you want to learn more about software testing, find a Software Testing Course that includes bug reporting, test case writing, and software such as Jira.
In this blog, we will teach you, step-by-step, about Jira and how to effectively and clearly report bugs so they get fixed quickly.
What is Jira?
JIRA is software created by an organization called Atlassian. It allows teams to monitor work and issues in software projects. JIRA revolves around “issues”. Issues may be bugs, tasks, or feature requests.
To put it in an analogy: Think of a large online whiteboard on which your team had all put up that which was needed to be done. Every note was an issue. For bugs, JIRA will enable you simply to type in the problem, who should do it and the state of the fix.
Key Features for Bug Tracking
Jira has many features that help with bug tracking:
- Easy Bug Creation: A bug report has a description, priority, attachments, etc, so with JIRA it is easy to create a comprehensive bug report.
- Workflow Tracking: Everybug goes through a number of states; e.g., Open, In Progress, In Review, Done, etc., so everyone is aware of the status.
- Role Based Access: You can assign multiple roles available, e.g. tester, developer, manager, etc., which can have their own permissions.
- Team Collaboration and Comments: Team members can talk about bugs in JIRA through comments, which will allow them to fix things faster.
- Search and Filters: JIRA offers you the feature to search for bugs by keywords, labels, priority or assigned to person, etc.
- Dashboards and Reports: You can graph the bugs count, time taken in fixing the bugs, and other important data in JIRA.
Jira Project Types
When you create a new Jira project, you will be asked to choose between two options:
- Team-Managed Project: This is easier to use, and is essentially for small teams that want to manage their own workflows. It is quick to set up and easy to manage without the requirement of specific Jira admins. It is primarily for smaller development or QA teams.
- Company-Managed Project: These projects are created and managed by Jira admins. They allow for much greater customization such as fully complex workflows, permission schemes, and reporting. Many larger organizations have many teams that all use Jira’s Company Managed Project option to manage things across departments or teams.
The answer to which project to use depends on the size of your team and your use case.
Prepare Jira for Bug Reporting
Create Reporting Project
First, you’d want to create a new project in Jira. You can use Bug Tracking template with default setting for bug reporting and workflows. You can give your project a name such as “Website QA” or “Mobile App Bugs”.
Having a different project to track bugs makes it easier to manage and find all bugs related to quality issues.
Set Up Issue Types and Workflows
In Jira an issue can be a bug, task, story, or anything else. Make sure you have a “Bug” as an issue type for the project. You can also set up workflows, ie; what a bug goes through before it gets resolved.
For example, a bug would follow this cycle:
- Open: Bug logged.
- In Progress: Developer fixes.
- Code Review: Fix reviewed by other developers.
- Testing: QA team confirms bug is fixed.
- Closed: Bug fixed and done.
Workflow statements are an excellent means of informing teams what they will be doing next.
Assigning roles and responsibilities
To keep Jira organized, you will need to assign some of these roles:
- Reporter – the person who discovers and reports the bug.
- Assignee – the programmer who corrects the bug.
- Reviewer – the people on the team who review fixes to bugs or test.
- Project Manager – the person responsible for tracking fixes to bugs.
Having the correct permissions means the right people can create, edit, or resolve bugs without any confusion.
How to Report a Bug in Jira
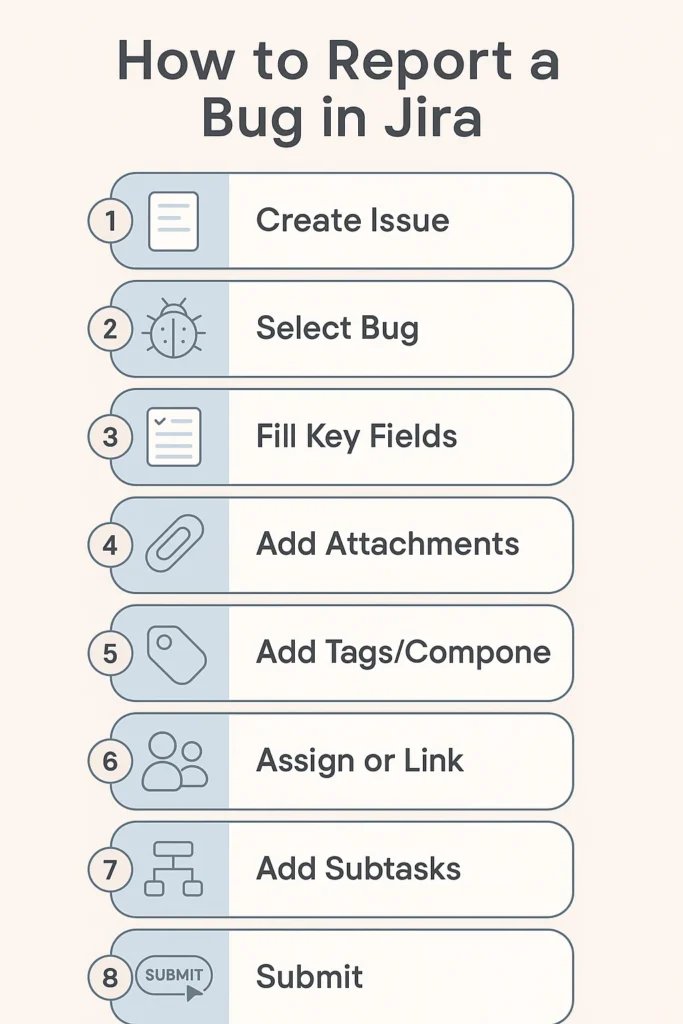
Step 1: Open the “Create Issue” Screen
Once you login into your Jira workspace, find the right project where you need to file the bug. In the top navigation bar, there is a “Create” button. Click that and it leads you to a form to enter in all the bug information. This is where you are going to begin documenting all the details. The goal is to capture the bug as accurately and as professionally as possible, and this is where you start.
Step 2: Select “Bug” as the Issue Type
In the issue creation form you’ll see an Issue Type dropdown menu, select “Bug” from the Issue Type list. This informs the team that this is a bug report/cause for complaint in the software, and will not be confused with a task or improvement request. It’s important to pick the right issue type particularly for filtering, prioritisation and workflow.
Step 3: Fill in the Key Fields
Complete the form correctly and thoroughly. Important fields include:
- Summary: A clear and concise title for the bug. For example: “Login button does not work on Chrome browser.”
- Description: Describe the bug simply and fully. This is the majority of your bug report, and should include:
o Steps to reproduce: List each step the user must take in order to see the bug. It is helpful to use numbered steps here, since that makes it easy to follow.
o Expected result: Explain what would have happened if the software was functioning correctly.
o Actual result: Explain what actually happened, emphasizing the malfunction or bug in the software.
Example: vbnet, CopyEdit
Steps to reproduce:
- Open the homepage
- Click the “Login” button
- Nothing happened
Expected result: User would be directed to the dashboard.
Actual result: When the login button was clicked a login box was not presented. There were no error messages displayed.
- Priority: Indicate how important or urgent the fix is (High, Medium, Low). Priorities allow the team to know what item to fix first.
- Environment: Describe where the bug exists, include information about:
o Browser: (eg. Chrome 125.0.6422.60)
o Operating System: (eg: Windows 11, macOS Sonoma).
o Device: (eg: iPhone 13, Dell XPS laptop).
o App version or build number if available.
Step 4: Attachments and screen recording
“A picture is worth a thousand words.” You may also include screenshots, error messages, logs, or screen recordings of you using or demonstrating the problem. Developers often appreciate this since they can see what the issue is without having to reiterate or back and forth clarify. You will be saving them time, which means they appreciate being able to communicate more effectively.
Step 5: Tags, Components and Versions
These will allow you to filter and group bugs more easily:
- Labels: You can add labels like login, UI, mobile, payment etc. which we can use to group or search in a similar way.
- Components: You can specify which area of the application is affected by the bug (e.g. “Checkout Page”, “User Profile”, “Search Bar”)
- Affects Version: you can specify which version of the software you found the bug in (e.g. “v2.3.1”) to help pinpoint if bugs have something in common if certain releases.
Step 6: Assign or Link Bugs
- Assignee: You may know the developer who should fix the bug (if there is a specific developer), so you may decide to assign it. Otherwise, the bug report could be left unassigned or assigned to the team lead or triage manager.
- Linked Issues: If this bug relates to other bugs, features, or tasks, link them together. For example, linking this bug with a user story, or with another bug report.
In linking, you are improving the chances that the related items get tracked together, and nothing gets missed if there is inter-dependency.
Step 7: Use Sub Tasks or Linked Issues for Bugs that Require Multiple Steps or Affect Multiple Components
If a bug requires multiple steps to resolve, or affects multiple components, break it into sub tasks. For instance, if there is a bug in the login process that has backend and frontend components, create sub-tasks for each part. This would allow the two developers to contend with their respective pieces, and it would allow you to track progress of both parts.
Alternatively, you can link issues if the bug is related to other existing issues (e.g., it is a previously known defect; or it affects an existing feature).
Step 8: Submit your bug report and save it!
Check it’s all there, and you can read it. Then click the “Create” button to submit the issue
Congratulations, your bug is now logged in Jira for the team to access.
Jira will automatically assign a unique issue ID (for example, BUG-123) for you to use in your communications and references.
Writing A Good Bug Report
What constitutes a good bug report?
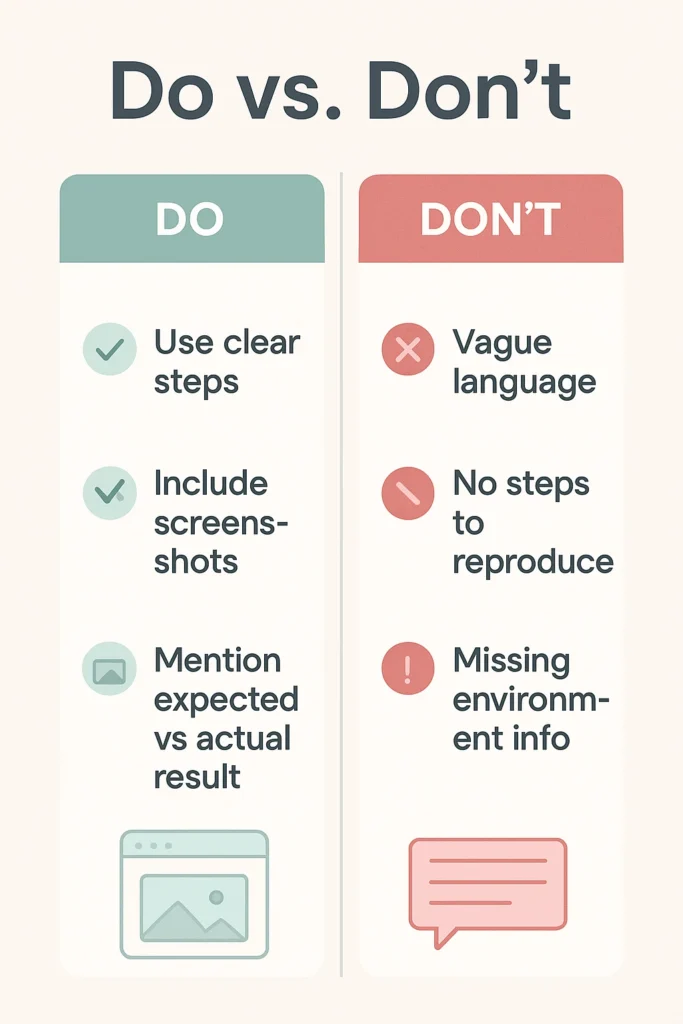
If you want to write a good bug report, keep in mind the following practices:
- Use clear, precise language: Do not use vague language like “not working.” Instead, specifically describe what is not working and under what conditions it is not working.
- Provide step by step instructions: Break down the steps of what you did in order to run into the bug. This helps developers to recreate the problem.
- Describe expected vs actual results: Show them the difference in results between what should have happened and what actually happened.
- Indicate the environment: Share what browser, operating system, device, and version of the app you used. In some cases, bugs are environment specific.
- Attach supporting files: Screenshots, videos, or logs help to make your report clearer, and provide developers with an easier path to investigate.
- Be polite and professional: Use a constructive tone. You are trying to help make the software better, not assigning blame.
- Log into your account
- Go to the profile settings page
- Click “Upload Image” and choose a valid image file
- Click “Save”
Mistakes to Avoid
- Vagueness: Telling someone “The page is broken” is unhelpful – be precise in your report.
- Lack of reproduction steps: If you don’t provide steps, there’s a chance others can’t reproduce the defect.
- Not including expected/actual result: This makes it harder to justify the issue as a bug.
- Not including picture verification: Screenshots or screen recordings almost always make things easier than words alone can describe.
By following the guidelines you will assist creating an understanding of the issue, which will get properly prioritized and resolved without wasting too much time.
Bug Tracking and Management
After a bug has been reported, the process is to track it from its inception through to completion – from the investigation to resolution. Jira has great tools that make bug management a smooth process ensuring nothing gets missed.
Prioritize and Assign Bugs
Not all bugs are equal. Some data will crash or corrupt and require urgent repairs, while others maybe a mere surface appearance of a UI issue. Rank bugs using Jira’s priority fields (Critical, High, Medium, Low) based on their impact and seriousness.
Once bugs are ranked, those bugs will need to be assigned to the appropriate developer. If you are unsure, do not assign it and let a project manager or technical lead assign it upon triage.
Prioritizing and assigning bugs ensures the team is fixing the most prominent issues, without bottlenecking progress.
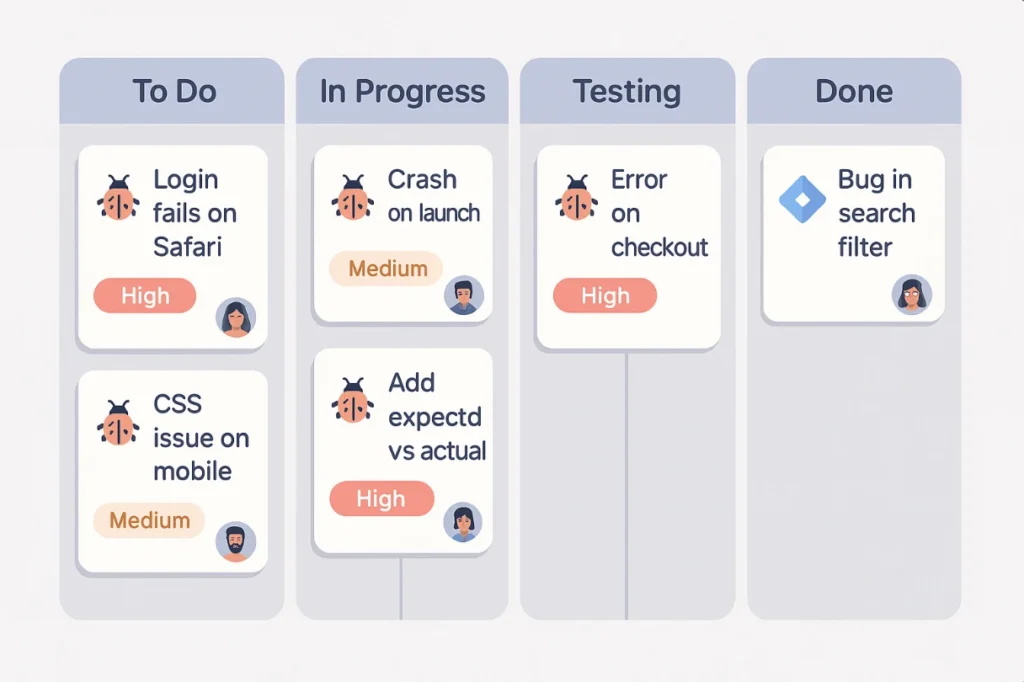
Use Filters, Dashboards, and Kanban Boards
Jira also lets teams stay organized visually and mentally:
- Filters: You can set filters to find bugs expeditiously, for example, “bugs unresolved and are high priority”, or “bugs assigned to me”.
- Dashboards: You can use visualizations and charts to show total bug status, that is, a pie chart showing the number of bugs in each state in the workflow (Open, In Progress, Closed).
- Kanban Boards: You can track bugs by manipulating columns one by one, highlighting which steps you have taken in your process. You can just glance at the Kanban board and see what you are working on and what is waiting.
These tools keep everyone in tune with one another and help managers with the high-level view because it is very easy to see progress.
Link Related Tasks and Track Progress
Often a bug is related to other tasks – for example, a bug caused by a feature, or a bug that is blocking other developers. In Jira you can:
- Link related tasks (hit, is caused by, blocks, is duplicated by) to help provide relationship context.
- Create subtasks there are multiple parts of the bug and there are multiple people working on it.
- Get resolution times using the reports to show your teams how long it takes to fix bugs, and to get a sense of trends or bottlenecks.
Tracking these consistently will help the team understand if they have recurring issues, prioritize quality improvements, and confirm that bugs are resolved before customers are affected.
Conclusion
Jira can be much more than a bug tracking tool – it is an end-to-end process for going systematically planning, developing, and refining the way teams manage issues throughout the software lifecycle. With the right use of Jira, the configuration of Jira, the production of reasonable bug reports, and the effective use of Jira’s tracking and collaborative features, teams can greatly improve their bug working process, reduce bug resolution turnaround time, and document the progress of bug fixes with issue comments and tracking workflow actions.
A managed and controlled bug tracking process, can support higher quality products, and improve communications to testers, developers, and project managers. As you accumulate experience, you will be able to adapt and refine your team’s existing process(es) within Jira, and document your work via Jira, regardless of where you start.
So, if you can stick to utilizing Jira on a regular basis, and do so in a thoughtful manner, you will find you will bring the everyday auditing of bugs into an extremely more organized, streamlined, and results driven section of your development workflow.

